


Sinking the Bismarck
Posted on 22nd February 2021
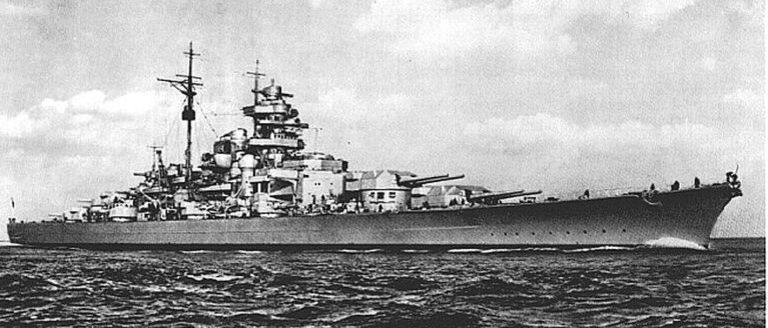
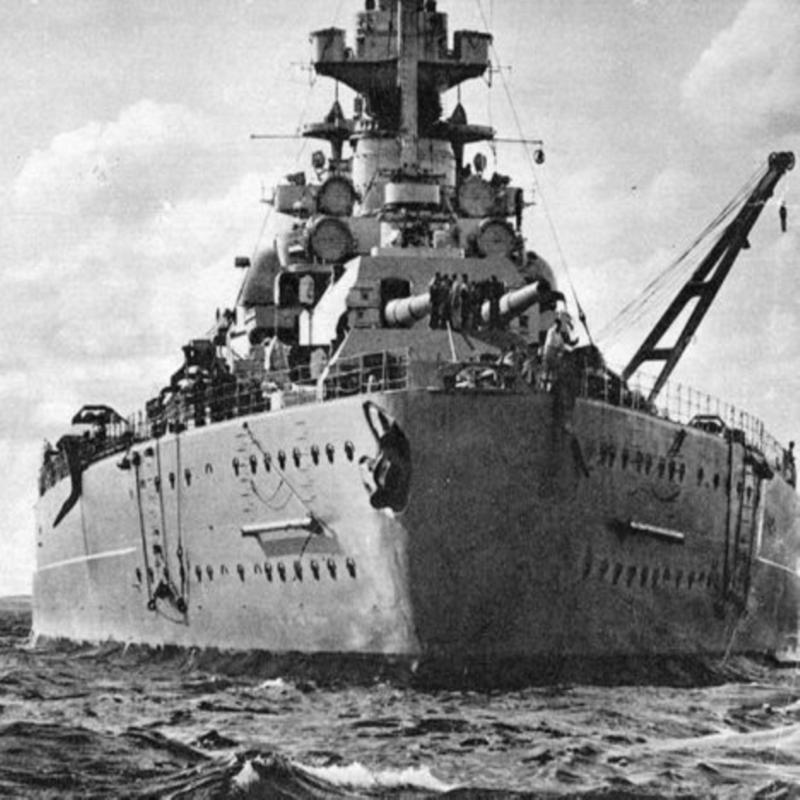
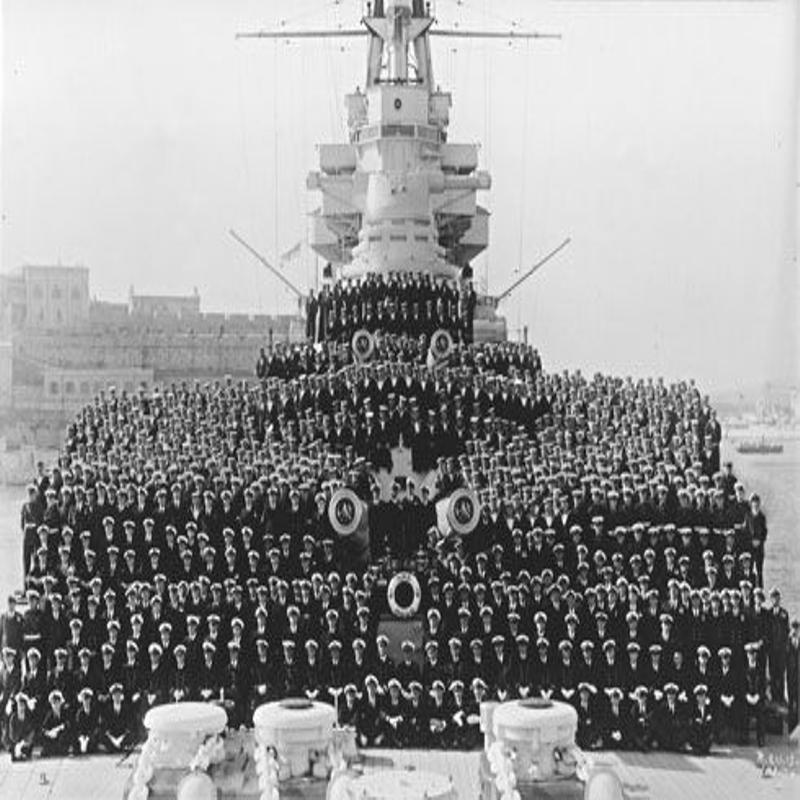
When the German battleship Bismarck was launched in April 1939, she was with a displacement of 41,700 tons, 8 x 15 inch guns, a 13 inch belt of thick armour, a speed of 30 knots, and a crew of 2,221 the largest and most powerful warship in the world and her mere existence sent a shiver up the spine of the other major world powers, in particular the British Royal Navy.
Her awesome power, along with that of her sister ship Tirpitz would only to be bettered by the Japanese Battleship Yamato launched in August 1940 and like her Asiatic counterpart she was only ever to conduct one mission but in doing so she was to administer a cruel blow to British morale.
Bismarck began her sea trials on 15 September 1940 and the Germans were keen to get her operational as soon as possible. Once out in the sea lanes of the North Atlantic she would be able to wreak havoc with the convoys coming from America that were vital to Britain’s survival.
The Commander of the Kreigsmarine, Erich Raeder, unlike his successor Karl Doenitz did not believe that the U-Boat alone would be enough to bring Britain to its knees and he was determined to implement his policy of using heavy surface vessels against British merchant shipping.
If a battleship with the immense power of the Bismarck could get among a convoy it could destroy it in double-quick time making the system untenable and forcing merchant ships to sail individually thereby making them easy prey for marauding U-Boats. The British supply line to North America would then be cut and Britain would either be forced to come to terms with Germany or starve.
The battleships Scharnhorst and Gneisenau were already operating out of Brest and the Bismarck’s while the Tirpitz had already participated in the bombardment of Spitzbergen during the Norwegian campaign.
Operation Rheinebung had originally intended for the Bismarck and Tirpitz accompanied by the Heavy-Cruisers Admiral Hipper and Admiral Scheer to link up with the Scharnhorst and Gneisenau and make for the shipping lanes of the mid-Atlantic. The Tirpitz however was not yet ready and a British bombing raid on Kiel Harbour had damaged supply depots meaning the Admiral Hipper and Admiral Scheer could not be sufficiently refitted. The Gneisenau meanwhile had been damaged by a torpedo while moored at Brest. Even so, a much-truncated Operation Rheinebung would go ahead with the Bismarck accompanied by the Heavy-Cruiser Prinz Eugen.
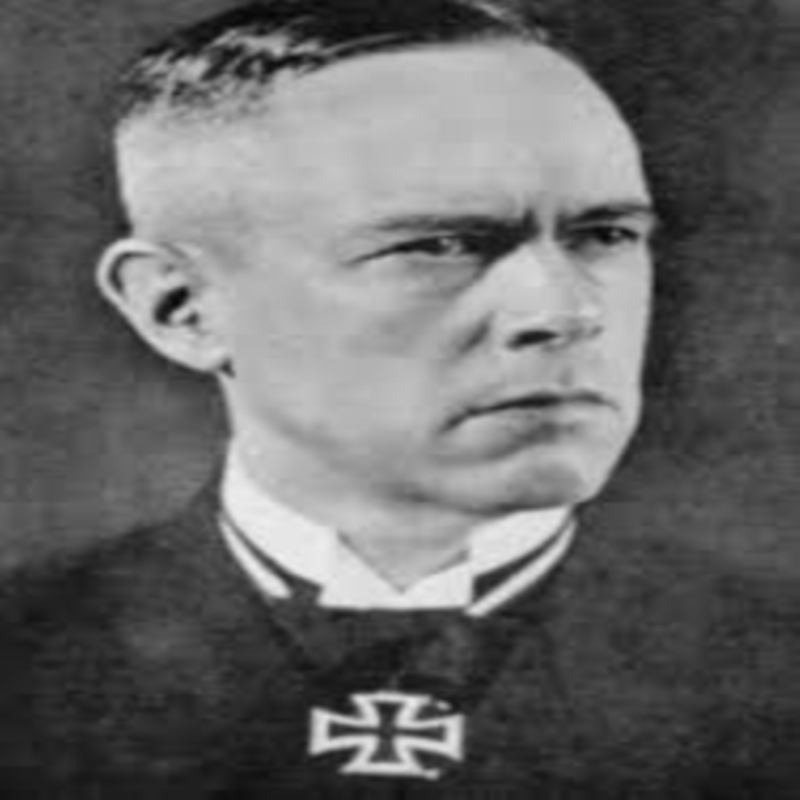
The man chosen to lead Operation Rheinebung was Gunther Lutjens, a 52-year-old veteran of the Great War with more than 30 years’ experience. He was a naval officer of the old school and was by no means a Nazi. Indeed, he was one of only three German Officers who had protested in writing the anti-Jewish pogrom of Kristallnacht in November 1938, and he is believed to have had a Jewish grandmother. He was nonetheless devoted to the person of the Fuhrer.
The Captain of the Bismarck was Ernst Lindermann, again no Nazi but a proud navy man acknowledged as a gunnery expert but one who had never commanded a ship at sea.
At 02.00 on 19 May 1941 the Bismarck and the Prinz Eugen accompanied by the Destroyers Z23, Hans Lody, Friedrich Eckholdt and a flotilla on Minesweepers left Gotenhafen Harbour in the Baltic heading for the Denmark Straits and the North Atlantic.
Merchant ships had been strategically placed enroute to meets the needs of re-supply and 4 U-Boats were stationed to act as convoy spotters but by noon of the same day any chance of secrecy had been lost when the fleet was sighted by Swedish reconnaissance aircraft. A little later they encountered the Swedish Cruiser Gotland which shadowed the fleet for more than two hours by which time the Royal Navy had been alerted.
In Britain, Admiral John Tovey ordered the Battleships Hood and Prince of Wales with 6 Destroyers to reinforce the 2 Cruisers already patrolling the Denmark Straits. If the Bismarck was to break out into the North Atlantic then she would have to fight to do so. This was something that Lutjens hoped to avoid and so at 04.00 he ordered his ships to increase speed to 27 knots with the aim of making a quick dash through the Straits before the Royal Navy reinforcements arrived.
By 19.00 on 23 May, they had reached a point north of Iceland, but they soon found that they were being shadowed by the British Cruiser H.M.S Suffolk. Lutjens ordered the Prinz Eugen to engage the Suffolk and under intense fire she was forced to withdraw but by this time the Bismarck’s position had already been reported back to the Admiralty in London.
The Suffolk was now joined by her sister-ship H.M.S Norfolk and despite Admiral Lutjens best efforts he was unable to shake them off. At 05.45 on 24 May, lookouts aboard the Bismarck reported two Battleships on the horizon – they were H.M.S Hood and H.M.S Prince of Wales.
H.M.S Hood had entered service in 1921 and was widely held to be the Royal Navy’s premier Battleship with an almost iconic status in the mind of the British public. She was considered the very epitome of British sea-power but by 1941 she was ageing and had evident faults. A major refit had been planned but the outbreak of war had put these on hold. By contrast the Prince of Wales had only recently been built with the work was not yet complete, indeed, she still had civilian contractors on board.
Though they were in a less than ideal position and could only bring their front turrets to bear at 05.52 the British ships opened fire at a range of 26,000 metres. Admiral Lutjens was reluctant to return fire as his orders were to attack and destroy Britain’s Merchant Fleet not engage in highly dangerous duels with other surface vessels and an argument now broke out between him and Captain Lindermann with the latter exclaiming: “I shall not allow my ship to be blown out from under my ass.” Lindermann won the argument and at 05.55 the Bismarck opened fire.
Meanwhile aboard the Hood, Admiral Sir Lancelot Holland and her Captain Ralph Kerr were desperately trying to manoeuvre the Hood into a position where she could bring all her guns to bear but by doing so, they made her vulnerable. At 06.00 the Hood was hit by a shell that made the entire ship shudder, moments later she was hit by another shell that penetrated the magazine. A massive explosion followed that tore the ship in two. Ted Briggs who was on the Compass Platform at the time describes seeing a huge sheet of flame before the ship almost immediately went onto its side. There had been no time to give the order to abandon ship and he recalls seeing Admiral Holland sitting calmly in his chair seemingly unmoved by events. Briggs managed to abandon his station in time but was dragged down by the ships suction as it sank and had given up all hope when a sudden burst of air pushed him to the surface. When he looked again the Hood had gone. She had taken just three minutes to sink and of the 1,418 men aboard only three survived. No bodies were later found floating in the water, they had all gone down with the ship. Ted Briggs was to remain in the water for three hours before finally being rescued almost dead from hypothermia by the crew of the Destroyer H.M.S Electra.
The Bismarck and Prinz Eugen now concentrated their fire on the Prince of Wales which continued to fight on for a time before damaged and outgunned she was forced to turn away. She had however scored three hits on the Bismarck despite many of her guns having malfunctioned. Her Captain, John Leach, had also had a lucky escape when a shell had torn through the bridge but failed to explode killing everyone present except for the captain and one other.
Significantly during the brief firefight, the Bismarck’s fuel supply had been hit and she was now leaking oil at an alarming rate. A Sunderland Flying Boat reported the leak back to the Admiralty and Admiral Tovey aboard the Battleship King George V ordered the Cruisers H.M.S Manchester, H.M.S Birmingham and H.M.S Arethusa into the Denmark Straits in case the Bismarck now made a run for port. He also ordered the Battleships H.M.S Ramilles, H.M.S Rodney, H.M.S Revenge, the Aircraft-Carrier Victorious and numerous other Cruisers and Destroyers to join in the chase.
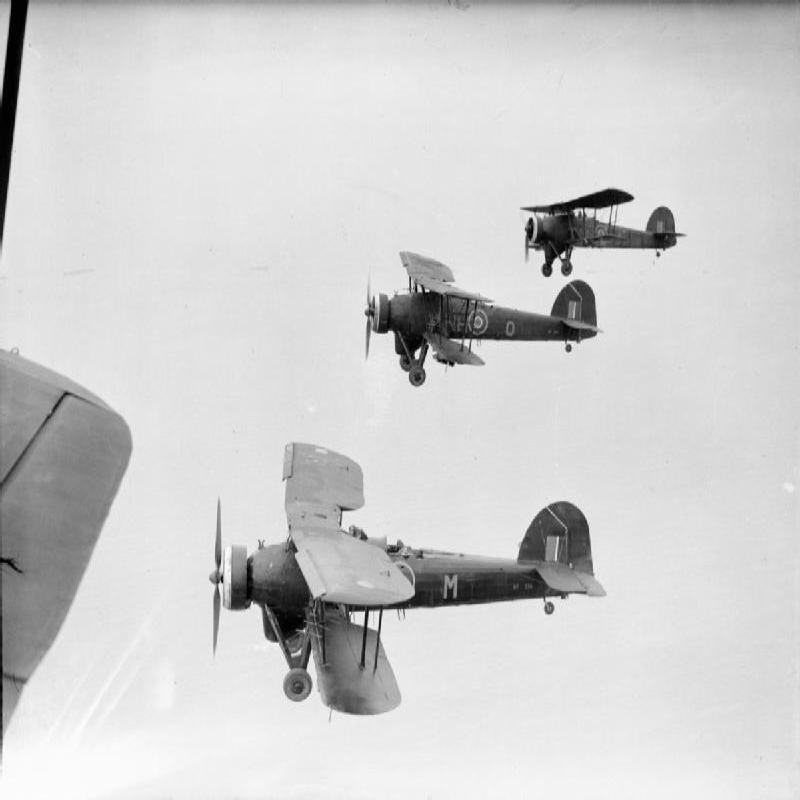
At 22.00 the Bismarck was attacked by torpedo bombers launched from Victorious, but little damage was done. Then at 03.00 all contact with the Bismarck was lost. There was panic at the Admiralty as it dawned on everyone that the Bismarck might evade the trap that had been so carefully laid for her and a frantic search now began.
During the day radio intercepts appeared to indicate that Lutjens was making for the French port of Brest, but she wasn’t spotted again until 10.30 on 26 May and the news wasn’t good. She was some 790 miles from her destination and at her current rate of progress she would be within the range of Luftwaffe protection in less than 24 hours and with no British ships standing in her way the only hope was to slow her down.
The Cruiser H.M.S Sheffield was dispatched to shadow the Bismarck but immediately came under an intense barrage which killed 3 men and forced her to withdraw out of range. Meanwhile, Admiral James Somerville in command of Force H ordered torpedo bombers from H.M.S Ark Royal to attack Bismarck at once. The first attack failed when inexperienced pilots bombed the Sheffield by mistake, but the second attack found its target. Two torpedoes struck the Bismarck, the second of them damaging her propeller shaft. The damage was to be far worse than had at first been feared and at 21.40 Admiral Lutjens signalled to Berlin:
“Ship unmanouevrable. We will fight to the last shell. Long live the Fuhrer!”
Out of fuel and almost dead in the water the Bismarck had become a sitting target.
With no hope of rescue and even less of victory the mood among the Bismarck’s crew was dark and morose – they knew the fate that awaited them and there was little enthusiasm for dying gloriously in a lost cause whether it, be for the Fatherland, the Fuhrer or anything else.
By daybreak on the 27 May, the British Capital Ships had caught up with the Bismarck which they found unaccompanied, Lutjens having ordered the Prinz Eugen to depart at 16.14 the previous evening after another exchange of salvos with the Prince of Wales.
As the Battleships Rodney, Repulse, and King George V closed in they could see the Bismarck going hopelessly around in circles.

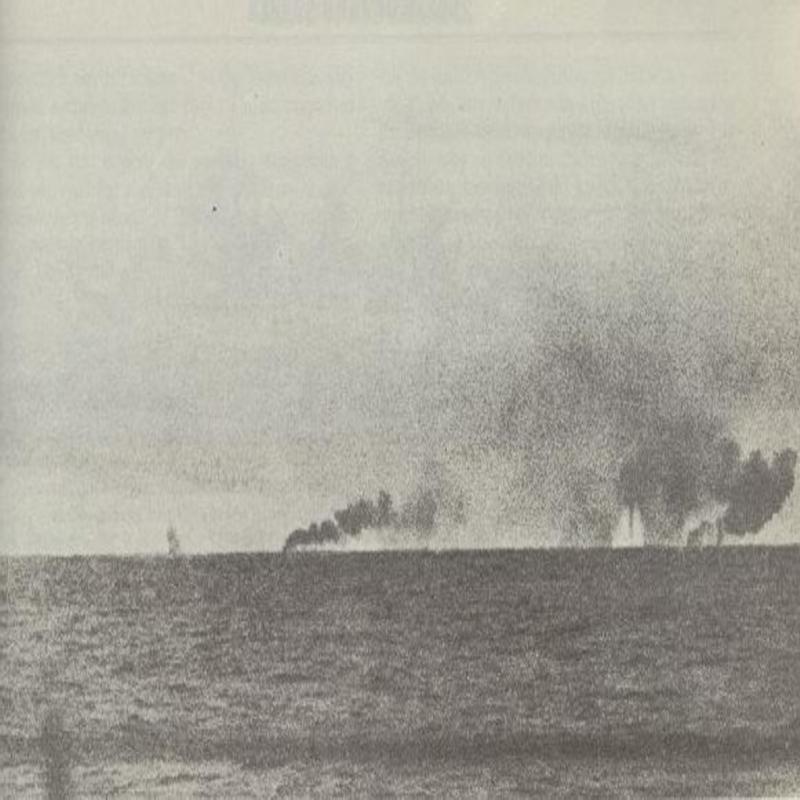
A Destroyer Flotilla under the command of Captain Vian was sent to harass her flitting in and out of range, launching torpedoes, and lighting up the great ship with star shells. At 08.47 having closed to within 10 miles of its target the Repulse opened fire, a few moments later the King George V did the same. The Bismarck returned that fire.
At 09.02 a 16-inch shell from the Rodney struck the Bismarck full-on killing hundreds of men and causing extensive damage. Moreover, the bridge was utterly destroyed, and Admiral Lutjens and Captain Lindermann almost certainly killed. Still the Bismarck fought on under the command of the Gunnery Officer Lieutenant von Mullenheim but by this time the British Cruisers had also closed to within range and had opened fire.
With its gunnery control centre destroyed von Mullenheim ordered the Bismarck’s guns to mark their own targets manually and fire at will. But it was no longer an ordered defence rather a desperate struggle for survival. By now the hits were coming thick and fast with explosions occurring in every part of the ship showering it in blood and body parts. The dead and the dying were strewn all over its decks but still it would not surrender, and no order came to abandon ship.
By 10.00 the Bismarck was ablaze from stem to stern and low in the water but having still not struck her colours Admiral Tovey ordered the firing to continue.
With most of her guns knocked out von Mullenheim ordered the Bismarck’s torpedoes launched, one of which exploded near the Rodney damaging her. It was the only time in history that a Battleship tried to torpedo another Battleship.
The First Officer aboard the Bismarck, Hans Oels, now began to rush about the Bismarck ordering everyone to leave their posts and abandon ship. He had also been ordered to open the water-tight doors to scuttle her but with the Bismarck already a burning hulk that could not possibly be boarded or towed to port there didn’t seem much point. Not long after Oels had given the order to abandon ship the Bismarck was struck by a shell that killed him and many other men.
At 10.20 Admiral Tovey ordered the Cruiser H.M.S Devonshire to close in and finish the Bismarck off. She did just that firing 4 torpedoes 2 of which struck the Bismarck amidships and at 10.35 the Bismarck capsized and began to sink by the stern. Five minutes later she disappeared beneath the waves.
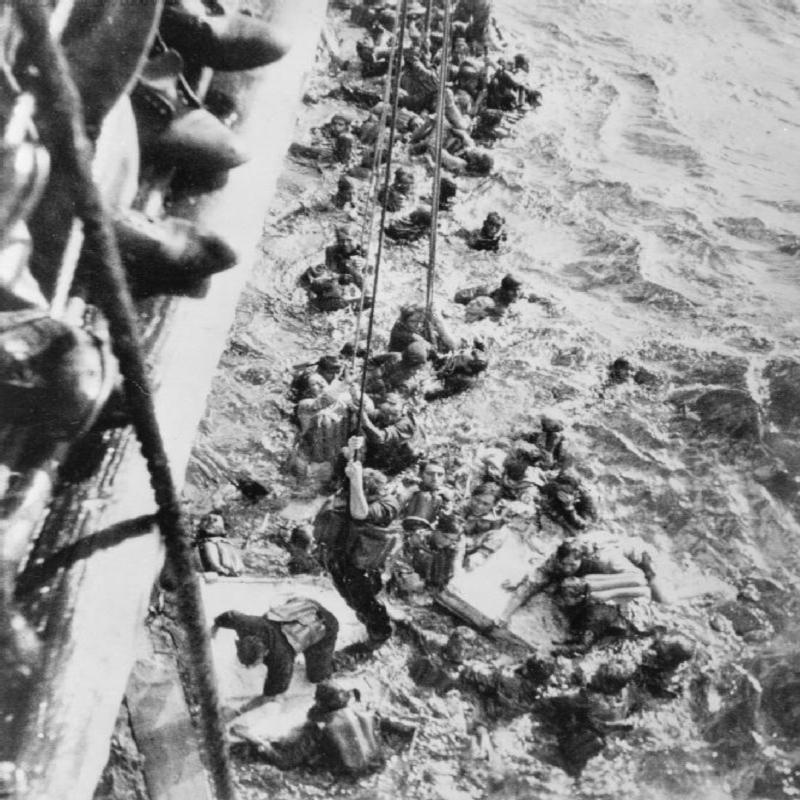
The Cruisers Dorsetshire and the Maori now moved in to pick up survivors but only 114 men out of her crew of 2,200 were plucked from the water and many of these had terrible wounds. At 11.40 the rescue mission was abandoned when U-Boats were reported in the area leaving many men still in the water to drown. It is a tough decision to make for a sailor to abandon another to his fate and it was to haunt many of those present for the rest of their lives.
The Bismarck had fought on to the bitter end, but this might not be the entire story. A young sailor aboard H.M.S Rodney named Tommy Byers claimed to have seen the Black Flag, the naval signal for parley, raised aboard the Bismarck and others claimed also to have witnessed the signal for surrender being sent by Morse lamp and by sailors aboard the Bismarck signalling in semaphore. Yet, at no point did the Bismarck cease returning fire.
Was there any reason then, to continue the assault when the Bismarck was dead in the water and virtually defenceless? Could hundreds of lives have been saved? It has since been claimed that the destruction of the Bismarck was revenge for the fate of the Hood, and it was certainly viewed in Britain as such and that the order to do so had come directly from the Prime Minister Winston Churchill.
It’s sinking was greeted in Britain with much rejoicing and the honour of the Royal Navy had been restored, but more significantly it removed a great menace to her Merchant Fleet and resulted in her sister ship the Tirpitz being effectively moth-balled in a Norwegian Fjord and used only sparingly.
It also ended Erich Raedar’s plan to use his surface ships to attack, disrupt, and destroy the convoy system and in future German naval operations to cut Britain’s lifeline to the United States would focus almost entirely upon Admiral Karl Doenitz’s U-Boat Fleet.
Postscript:
The apparent barbarity of leaving men struggling in the sea to drown (so graphically illustrated in Nicholas Montserrat’s novel The Cruel Sea) was the result of lessons learned from the First World War when on 22 September 1914 whilst on routine patrol in the English Channel three British Cruisers were torpedoed and sunk by the German submarine U.9.
At 06.20 an explosion aboard H.M.S Aboukir saw her settle in the water before capsizing and sinking some twenty minutes later. As no submarines had been spotted in the area it was assumed that she had struck a mine and so the Cruisers H.M.S Hogue and H.M.S Cressy were ordered to pick up survivors. Both ships having stopped were sitting targets and were also struck by torpedoes fired by U.9 sinking with the loss of 1,459 lives many of them young Sea Cadets still in 8 training.
The loss of the three Cruisers caused outrage in Britain and the order was given that henceforth no Royal Navy ship was to stop to rescue survivors if there was any possibility of submarines being in the vicinity.
Share this post: